
Joint Between Beam And Wall Frame
When creating a joint between a beam and a wall frame, the result is a macro that determines how the studs at the beam are notched. After you have created the panel breaks and panel drawings, you can refresh the panel drawing of the wall with the joint data by saving the panel drawing. When you save the panel drawing, the program interprets the macro determining the notch and creates the notch. After this, the notch is displayed in the 3D model of the frame. The piece list of the panel drawing will also be refreshed with the notch data.
- Select Modeling | Connection |
 Joint
Joint  Profiles
 Connection
Details. The browser is opened.
Connection
Details. The browser is opened. - Select the Wall frame folder in the browser. Select the Stud notch for beams joint.
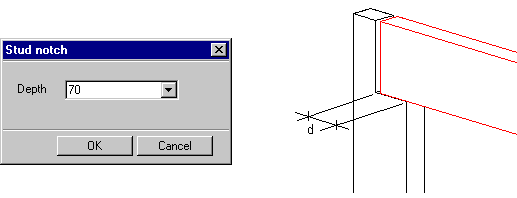
- Select the depth of the notch in the longitudinal direction of the beam in a dialog box.
Select the depth from the list or type the value in the text field.
- Select a wall.
- Select the beam.
- If you have created a joint between the beam and the wall earlier, delete the old joint by
selecting Delete in the message box.
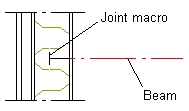
The program will add a macro to the joint, and its geometry will be displayed in the 2D drawing.
 Note
Note
- The height of the beam does not affect the height of the notch, but the stud will be notched from the bottom surface of the beam all the way to the top of the stud.
- If you move the beam, change its cross section or change the depth of the notch, open and save the panel drawing to refresh the changes in the notch and in the 3D model of the frame.