
Column End Drilling + Screw Leg
You can connect a column end to a log wall using an end drilling and screw leg joint. The joint adds machining to the column. The joint is also displayed in the log work drawing. If you remove or add logs above or below the column, the joint will follow.
- Activate the model window.
- Select Modeling | Connection |
 Joint
Joint  Profiles
 Connection
Details. The browser is opened.
Connection
Details. The browser is opened. - Select the Log Walls folder in the browser.
- Select the 0004 Column end drilling + screw leg joint.
- Select a log wall.
- Select the ends of the columns to be connected.
- Select Confirm. The Column Screw Leg Joint dialog box will open.
- Define the joint parameters in the dialog box.
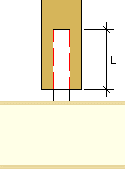
- Drilling length - Select the drilling length (L) from the list
or enter the desired value in the text field.
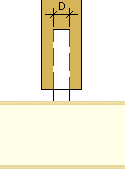
- Drilling diameter - Select the drilling diameter (D) from the
list or enter the desired value in the text field.
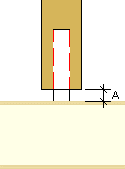
- Settling space - Select the settling space (A) from the list or
enter the desired value in the text field.
Confirm by clicking OK.
- Drilling length - Select the drilling length (L) from the list
or enter the desired value in the text field.
- If you have created a joint between the column and the wall earlier, delete the old joint by selecting Delete in the message box.
 Note
Note
- The joint is also displayed in the log work drawing.
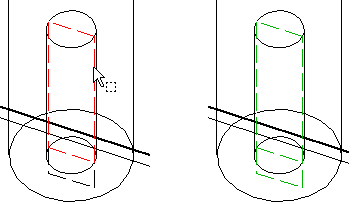
- You can remove a joint in the following ways:
- Select the red dashed line describing the joint in the wire frame model and press the
Delete key.
- Select
 Disconnect from the context-sensitive menu of the column's
end grip point.
Disconnect from the context-sensitive menu of the column's
end grip point.
- Select the red dashed line describing the joint in the wire frame model and press the
Delete key.
- When you add a log column, the program adds the settling space and screw leg to the top or bottom of the column according to your selection. After creating the joint, delete the screw leg macro from the log work drawing.