
Add a Flanged Pipe Component
Piping Design
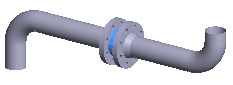
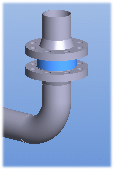
When you are adding a pipe component that requires a flange for connection to the pipeline, the program will automatically offer a flange selection from the library.
Add a flanged pipe component.
- Create a
 New Assembly to the Archives
- On the
 tab, in the Add group, click
  Add Component (G4)
 - On the
 tab, in the Add group, click Add Component (G4 Plant).
- On the
- Select in the Browser the Pipe accessories.
- Select from the the search result the component, and select the context-sensitive function
 Select.
 - Edit the component data in the Dimension Table, and click OK.
- Click the center line of the pipe to which you wish to add the valve. You can move the valve in the direction of the center line.
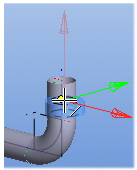
- Click a location for the valve from the pipe end at its handle.

The valve is positioned on the pipe.

- The program will prompt you to select a counterflange from the library. Select a counterflange. The flange will be positioned on the pipe, attached to the valve.
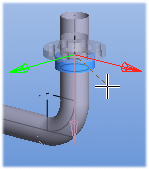
- Select Confirm.
- Select another counterflange from the library. The flange will be positioned on the pipe, attached to the valve.

- Select Confirm.
Note:
- A flange connection will be made when the Connection with a flange property has been defined for the handle in the component's pipe connection data.