
Truss Structure Dialog Box
Select a truss to be added or edit the truss library in the dialog box. You can only edit customer-specific libraries in the custom/complibs/trusses folder.
Dialog Box Options
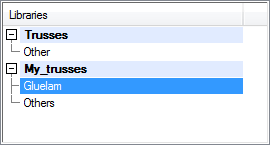
- Libraries
- You may have several libraries available. The trusses are grouped by selection groups in the libraries. Select a library and a selection group from the list in the top left-hand corner of the dialog box. You can search for a library by activating the list box and pressing Ctrl+F. Enter the character string to be searched for in the text box. If you wish to collapse or expand all libraries, right-click to open the context-sensitive menu and select Expand all or Collapse all.
 Create a New
Library
Create a New
Library-
Edit the Description of a
Library
-
Select Available
Libraries
-
Delete a Library
- Trusses
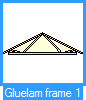
- Select the thumbnail image of the truss to be added in the bottom left-hand corner of the dialog box. You can search for a truss by activating the list box and pressing Ctrl+F. Enter the character string to be searched for in the text box.
 You can only edit the trusses in
the customer-specific library in the custom/complibs/trusses folder.
You can only edit the trusses in
the customer-specific library in the custom/complibs/trusses folder.-
Create a New Component to a
Library
-
Move a Component From One
Library to Another
-
Edit the Library Data of
a Component
-
Delete a Component From a
Library
-
Representation of Thumbnail
Images
-
Edit a Truss Saved in the Library on a Work
Plane
- Save to Library
- Save the truss displayed in the preview window to the library. Use this function if you have modeled a new truss or edited an existing truss on a work plane. Define the library data of the truss in the Truss Library dialog box.
-
Library Data of a Truss
- Properties
- Select a new cross section or edit other properties of the truss as follows:
- Show only profiles
- When the check box is selected, the preview image only shows the truss parts, not the truss volume.