
Edit the Edge Detail of a Wall Panel
Framer
The edge details of a wall panel are determined by the frame layer's framing tool. If necessary, you can change an edge detail, for example the top or bottom plate detail, or the detail at a panel's cutting point. In addition, you can define the distance between the first stud and the edge of the panel.
- Select a wall panel.
- Activate the middle grip point of the edge by moving the cursor close to the point.
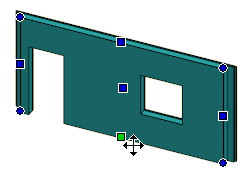
- Right-click to open the context-sensitive menu.
- Select
 Edit Edge Detail.
The edge detail according to the framing tool is displayed in the field Default Detail.
- Select a new detail from a list.
If necessary, you can remove the selected detail and restore the default detail by clicking Reset.
- When you edit the edge detail of a panel’s break point, you can also select the following properties:
- Stud Start - Enter the distance between the first stud and the panel edge. This determines the position of the first stud, if any other stud position method is not in use. The distance is measured from the end of the panel to the center of the stud.Note: If the stud rule Sheet generates studs has been selected for the framing tool of the sheathing layer, it overrides this definition.
- Mounting of insulations on the edge - Select Mount Manually or Loose Part as the mounting method for the insulation sheet closest to the edge. For example, a loose piece is a piece to be mounted at the building site, a manual piece is a piece to be mounted manually in the factory. The property affects the material collection. You can highlight loose parts and parts to be mounted manually in the model. See Mark Exceptional Parts.
- Stud Start - Enter the distance between the first stud and the panel edge. This determines the position of the first stud, if any other stud position method is not in use. The distance is measured from the end of the panel to the center of the stud.
- Regenerate the panel parts.