
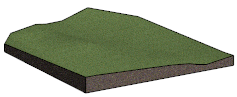
Add a Terrain
You can add a terrain by selecting the corner points of the lot and other terrain points and/or elevation curves. You can select any points from the drawing as terrain points. If you wish to add a terrain by selecting elevation curves, first draw the lines depicting the elevation curves in the drawing, see Preparations. You can select the terrain properties when adding the terrain, or later when editing the terrain.
- Select Modeling | Zone |
 Add Terrain.
The Terrain Properties dialog box opens.
- Select the method for defining the height of the points. In the drawing, you can define the height according to either absolute or relative height system. In the absolute system, the height is measured in relation to the sea level. This requires that the building’s height data - site height, site height from model origin and building height from model origin - have been set, see Building Coordinates and Heights. The building height calculated according to the given height data is displayed in the Base z-height [m] field. If the height data has not been set, the systems do not differ from each other.
- Digitized - Click the points in the model.
- Absolute - Enter the height of the terrain point in relation to the sea level, and click a point in the drawing.
- Relative - Enter the height of the terrain point in relation to the model's origin, and click a point in the drawing.
- Enter the height in meters in the Active z-height [m] field, when you click the points in the floor plan drawing.
- Click the points or lines, which will obtain the given height.

By using an auxiliary function, you can select either the entire line or just the clicked point.
 - Select all points of the line is selected by default. The entire line you click will be selected.
 - Clear Select all points of the line. Only the point you click on the line will be selected.
 - Select Confirm.
- Click Add.
- Enter a new height in meters in the Active z-height [m] field.
- Click the points or lines, which will obtain the given height.

- Select Confirm.
- Click Add, and click the other points of the terrain in the same way.
- Select the terrain properties in the dialog box.
- Confirm by clicking OK. The terrain is modeled in the model window.

Note: You can cancel the last clicked point by pressing Ctrl+Z.