
Add a Downspout
Add a downspout to a building as follows:
- Do either of the following:
- Select Modeling | Accessory Component | Component gallery

 Component.
 - Right-click to open the context-sensitive menu, and select
 Add Furniture, Symbol, Building Group....
The browser is opened.
- Select Modeling | Accessory Component | Component gallery
- Select the Outdoors/Rainwater folder.
- Double-click the downspout's thumbnail.
- Select the parameters of the downspout:
- Dim from wall to center of downspout (D1)
- Total height (H1)
- Top part height (H2)
- Straight part length (H3)
- Top level height (Z) - If you click the location of the downspout in the drawing, type the top level height in the text field.
- Starting part length (H3)
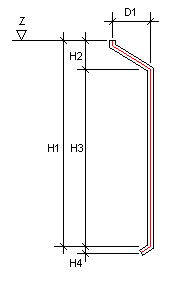
 Dimension are the dimensions of the downspout's center line.
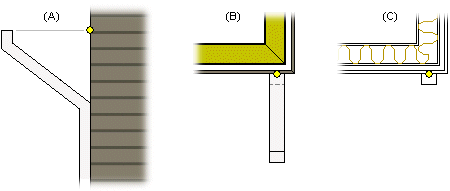
 - If necessary, change the locating point of the component, mirror or flip the component, edit the parameters of the component, or select another auxiliary function from the menu which opens by right-clicking. The default locating point is the point shown in the figure. Figures A and B are model projections, figure C is a drawing.
- Select the location of the downspout.
 Note
Note
- You can add gutters either as separate profiles (select the profile library Gutters) or when adding the eaves trims (select a trim type which includes gutters).