
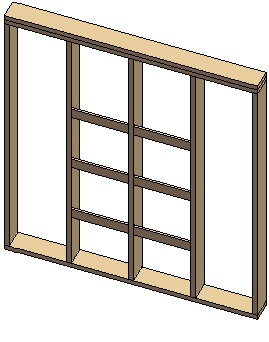
Ladder
Framer
Ladders are always added between two studs. Locate the ladder macro at the location of a cabinet, for example. When you create the parts of a wall panel, the program will add the ladders vertically between the nearest studs at an even spacing.
- Select Modeling | Panel |
 Wall >
  Wall Panel Layout Accessories.
 - Select Extra Ladders to Floor Plan from the browser. The Cabinet Backer dialog box opens.
- Select the backer properties:
- Size - Select a cross section from the profile library by clicking the Select button.
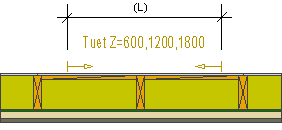
- Length - Type the length of the macro (L) in the field. When you create the parts of a wall panel, the backers are added at the location of the macro between the nearest studs, or, if necessary, between more than two studs.
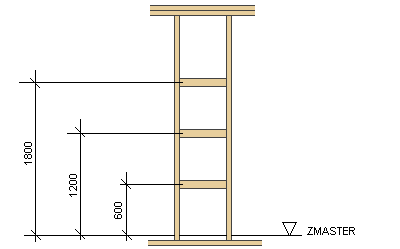
- Height - Type the heights of the ladder backers in relation to the floor base height (ZMASTER) in the field. Type the heights measured to the center lines of the profiles. Separate the heights with commas, for example: 600,1200,1800.
- Side - Select either of the following as the location of the ladder backers:
- Int - The ladder backers are positioned on the inner surface of the frame.
- Ext - The ladder backers are positioned on the outer surface of the frame.
- Confirm by clicking OK.
- Select a wall.
- If necessary, change the locating point of the macro, or select another auxiliary function.
- Select a location for the macro.
- Quit by pressing the Esc key.

Note:
- You can relocate the panel macro by dragging the grip point before generating the panel breaks.
- Once you have generated the wall panels and added parts to them, you can add a backer, stud, or blocking to the panel by using the function Studs.