
Example: Add a Closed Log Wall Chain
In this example, log walls are added to a 2D drawing.
- Activate the 2D drawing window.
- Select Modeling | Wall Layout |
 Wall.
Wall. - Select the Log Wall Library and the selection group Log Wall.
- Select Parametric log wall, and select the log wall parameters.
- Click OK to close the dialog box. The selected wall structure and default locating point are displayed on the status bar.

- Select
 Coarse representation.
 - Change the locating point to
 Wall inside.
 - Click the first point.
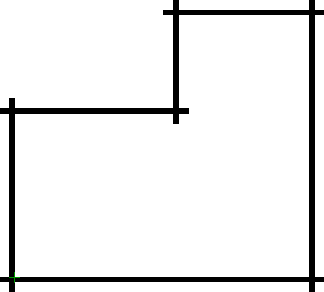
Select the first point of the wall chain as the origin point of the drawing. The origin point is marked on the drawing with a green cross. Move the cursor near the origin and click the left mouse button.

- Lock the cursor in the direction of the Y axis in one of the following ways:
- Press the I key.
- Move the cursor in the direction of the Y axis until the cursor looks like this
 and click the left mouse button.
 - Select Constraint > Y axis from the context-sensitive menu.
- Select the distance to the next point. Type the distance in the Distance field of the Coordinates Input dialog box. The dialog box will open when you press a numeric key on the keyboard.

- Click the other points approximately as shown in the figure below.
- Select
 Toggle open/closed wall.
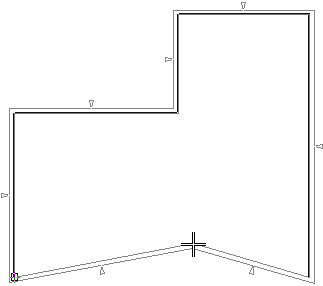
- Select Confirm.
- Exit the function by pressing Esc.
