
Add a Pipe or Duct Component to a Grip Point
Piping Design
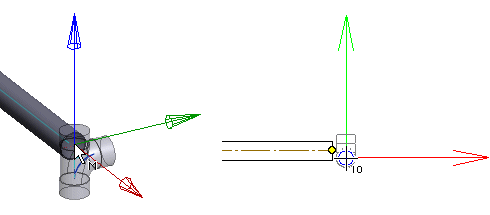
You can add a component to the grip point of a pipe, duct or another component.
- Do either of the following:
- Select Modeling |
 Pipe
Pipe 
 Part.
Part. - Select Modeling | Pipe
 Part.
Part.
The browser is opened.
- Select Modeling |
- Select a component.
- Select properties for the component:
- Select properties in the fields on the tab.
- If editing the component in a dimension table is allowed, select the
Piping | Component |
 Dimensions, and edit the properties.
- Before locking the component to the grip point, you can turn the component using auxiliary functions.
- Select the grip point. The component is locked to the grip point.
- Before clicking a location for the component, you can rotate the component or select the
next grip point of the component. If necessary, rotate the component in the model Activate
the model window by pressing the F2 key. Return to the drawing window by pressing the F2 key again.
- Rotate the component
 Rotate to the Left or Right by a Single
Rotation Step
Enter the Rotation Angle around the Z
Axis
Rotate to the Left or Right by a Single
Rotation Step
Enter the Rotation Angle around the Z
Axis - Select the next grip point
You can position a component using its active grip point. If more than one grip point has been defined for the component, you can change the active grip point. Click the button:

- Rotate the component
- Accept the component location by selecting the Confirm function.
 Note
Note
- If necessary, you can zoom the model in or out with the mouse wheel or the F6 key in order to see the end point (grip point) of the center line.