
Align Part Numbers
General
- If you want the drawing to look finished, the part numbers should be located, for example, in the same places horizontally and vertically.
- This is possible both when adding part numbers and later as shown below.
- You can align the part numbers of a drawing horizontally, vertically, or in a 45° angle.
- Begin the organizing of the part numbers from the lowest number and proceed in numerical order to the greater numbers.
Move the Part Numbers to the Same Line
- Select Drawing | Dimensions |
 Fast Dimensioning >
  Move.
Move. - Click the smallest part number in relation to which you want to place the next part number.
- Drag the smallest part number to the desired location and click it into place.
- Click the next number in numerical order.
- Drag it to the same horizontal or vertical line or 45° angle in relation to the previous number.
- The program draws a guide line when you are close enough to the line.
- Click the selection button of the mouse on the guide line, and the part number will be locked on the line of the guide line.
- Slide the part number on the line to the desired position.
- Lock the part number's location by clicking.
Example:
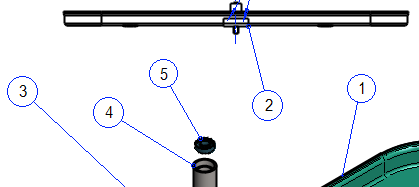
- Part numbers before moving
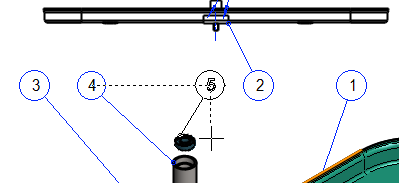
- The numbers have been moved from 1 onwards, after which the numbers have been moved in numerical order.
- In the figure, number 5 is locked in the same horizontal line as number 4 and is being slid into position.