
Framing Tools: Sheathing
Framer
A common sheathing tool that allows you to add sheathing to the sheathing layer of a wall panel, a floor or roof, or a floor or roof panel. Select Tool from the list. The parameters are set according to the selected tool. If necessary, edit the parameters in the dialog box. The parameters define the sheet sizes, sheathing direction, alignment, etc. The following sheathing tools are included in the basic software delivery:
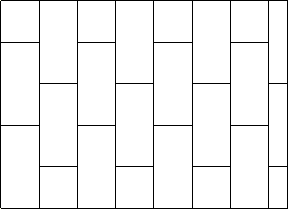
- Continuous (CONTINUOUS) - A continuous sheathing style to minimize material waste. The sheathing seams are placed so that the left over parts are utilized in accordance with the spacing of the framing. Parameter Overlap = Spacing.
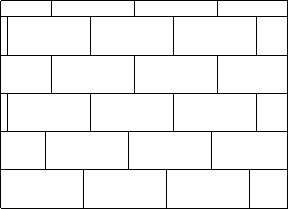
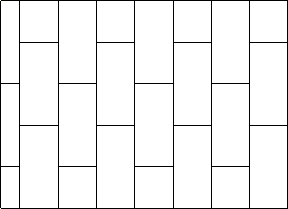
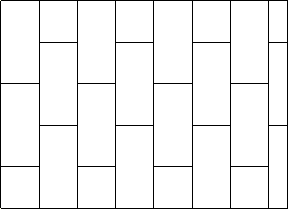
- Staggered (OVERLAP) - This option makes the sheet seams overlap. Parameter Overlap = Half.
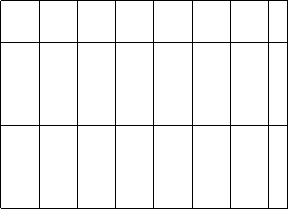
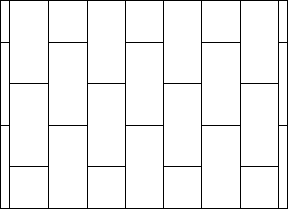
- Grid (GRID) - The sheets are positioned in the sheathing area so that their seams are continuous. Parameter Overlap = None.
Sheathing Rules
- Overlap
- The overlap is set according to the selected tool. If necessary, you can change the overlap.

- Sheet code
- Select the sheet by clicking Sel.
- You can first narrow your search results with the column filter function. Set a filter by typing a keyword in the filter field, or click the
 button and select a keyword from a list. For example, to filter only sheets of a certain size, type a keyword in the filter box in the Sheet code column. Press the Enter key to filter. Press the Enter key to filter.
 - Gap
- Determine the gap for the seams of the sheathing. Select either of the following:
- Flip
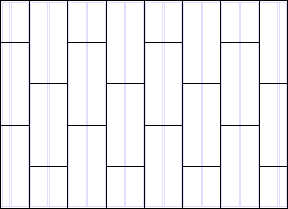
- Select the sheathing angle in relation to the frame layer framing from the list. For example, select the tool Staggered:
- Rotate sheets at wide openings
- The program will rotate the sheet if the seams are located at the opening edges and the area below or above the opening can be covered with one rotated sheet.

- Align
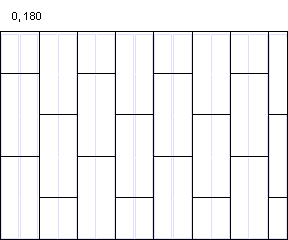
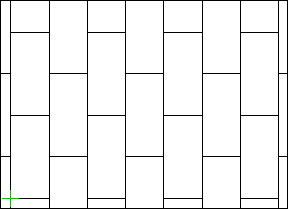
- Select where to start sheathing in the X axis direction. For example, tool Staggered, Angle = 0, Layout direction = From bottom to top.
- Layout direction
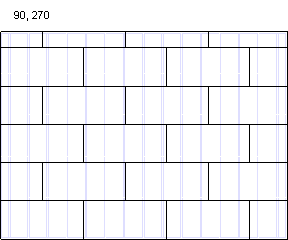
- Select where to start sheathing in the Y axis direction. For example, tool Staggered, Angle = 0, Align = Left.

- Offset in sheet’s width and height directions
- Enter an offset for the origin of the sheathing area in x and y axis directions of the sheathing area.
Alignment Rules
- Align
- When this feature is enabled, the program tries to align the seams of the sheathing to the frame parts. If necessary, the program resizes the sheet. Select the sheet edges to be aligned:
- Both sheet edges
- Sides only - Side is the longer edge of the sheet.
- Ends only - End is the shorter edge of the sheet.
- The minimum overlap
- If the sheet overlaps the frame part at least for the minimum overlap, and the frame part also has space for the next sheet, the edge of this sheet will not be moved when aligning the sheets.
- Connect adjacent studs
- If alignment is enabled, the program creates a block from adjacent frame parts. The sheet seam can be located anywhere in the block, if the value of the parameter The minimum overlap is sufficient.
Other Rules
- Adjust the widths so that last sheet's width is at least x mm
- If the last sheet in the sheathing direction is narrower than this width, the program widens it by moving the sheet seam, so that the previous sheet becomes narrower. If the alignment rule is used, the seam is positioned on the frame part. Otherwise, the sheet width is set to the value entered in the field.
- Sheet break to opening wider than
- The sheet seam is located at the edge of the opening when the opening is wider than the given value.
- Minimum allowed seam distance
- Enter the minimum distance from the seam of the layer where the sheets are to be added to the seam of the other sheathing layer.
- Inner layer - The layer is closer to the frame layer than the layer where the sheets are to be added.
- Outer layer - The layer is further from the frame layer than the layer where the sheets are to be added.
- Allowed widths
- Predefined sheet sizes. If the sheet needs to be resized for alignment, the program will try to use the sizes given here.
Opening Offsets
- Left, Right, Bottom, Top
- Enter the distances of the sheet from the opening edges in the fields. The opening offsets are taken into account for the following openings:
- Wall panel:
- Windows
- Doors
- Floor or roof, or floor or roof panel
- Sky window
- Ceiling hatch
- Chimney
- Wall panel:
- Apply offsets also for oblique shapes
- The opening offsets are also taken into account for the slanted edge of an opening.