
Set a Gap (Offset) when Trimming Profiles
Profile Structure Design
Set a gap when trimming to a face or part, for example for a welding groove.
The function is in use when
- You add a profile and use trimming to face
 .
. - You add a profile and use trimming in miter
 .
. - Profiles | Trim |
 Face.
Face. - Profiles | Trim |
 Part.
Part. - Vertex G4: Assembly | Tools |
 Face
Face - Vertex G4: Assembly | Tools | Face >
 Part
Part - Vertex G4: Assembly | Tools | Face >
 Miter
Miter - Vertex G4 Plant: Assembly | Steel Structures | Face
- Vertex G4 Plant: Assembly | Steel Structures | Face > Part
- Vertex G4 Plant: Assembly | Steel Structures | Face > Miter
Note: The software remembers the previous gap value, so if you select first the profiles and then the trimming function for example from the Profiles tab, the software uses the previous gap value.
Set the gap as follows
- Use one of the add or trim functions mentioned above.
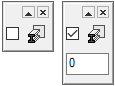
- Click the auxiliary function , or

- The auxiliary function depends on the main function.
- The program opens a number field where you can enter the gap size.
- Enter the size of the gap in the number field in the menu of the working window
 .
.- The appearance of the auxiliary menu varies depending on the function used.
- The default value for the gap is zero.
 Note that the program remembers the size of the entered gap also in the context-sensitive function Trim Profiles > To Edge, where the size of the gap cannot be entered.
- Complete the function:
- Add the profile or
- Trim the profile.