
Seams and Stacks
You can create joints and add joint components between wall panels. The joint component data is also collected in the material report. The joint components are shown in the floor plan, model and panel drawings.
Select the joint type from the connection details library. The folders and joint components in the library and the application development program determining how the joint is formed are customer-specific.
Examples from the basic software delivery are presented below.
Seams
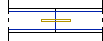
- Select Modeling | Panel |
 Wall >
  Framing Accessories.
 - Select the folder Seams and Stacks.
- Double-click (2010) Seams.
- Select the joint component.
- Select the wall panels.
- Select Confirm.
Seams, Free End

- Select Modeling | Panel | Wall > Framing Accessories.
- Select the folder Seams and Stacks.
- Double-click (2020) Seams, free end.
- Select the joint component.
- Select a wall panel.
- Click the end, on which you wish to add the joint component.
Stacks
Creation of these joint types requires that there be a wall panel on the floor above or below the selected wall panel. The center lines of the wall panels must be coincident. You can create the following joint types:
- Stacked bolts (A)
- Stacked holes (B)
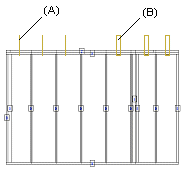
- Select Modeling | Panel | Wall > Framing Accessories.
- Select the folder Seams and Stacks.
- Double-click either of the following:
- (2030) Stacked bolts
- (2040) Stacked holes
- Select the joint component.
- Select a wall panel.
- Click a position.