
Create a Smart Model
Sub Projects
Create a smart model as follows:
- Select the the building components in the floor plan or in the model.
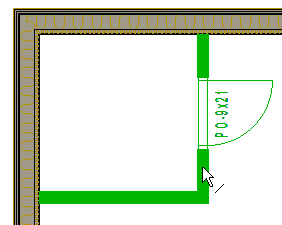 Note: Basic geometry (lines, dimensions, hatches, texts) and 2D components formed from basic geometry cannot be selected for the smart model.
 - Right-click to open the context-sensitive menu.
- Select Smart Model > Save.
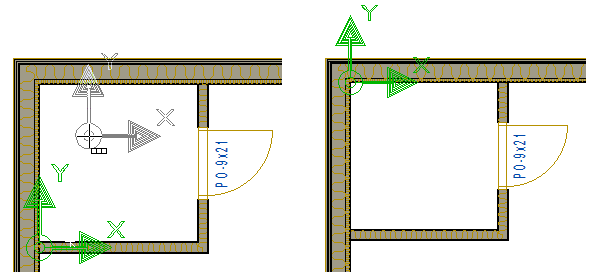
- If necessary, change the location of the origin point. The origin point will act as a locating point when you add the smart model. Bottom left corner is the default, but you can select any location as follows:
- Click the arrow symbol.
- Click the new location.
- Select Confirm. The New Smart Model dialog box opens.
- Make the selections in the dialog box.
- Enter the project id and name.
- Select the template project.
- Select the saving location.
- If necessary, update the default layer scheme.
- Confirm by clicking OK.
- Save the main project.
The origin point of the smart model is represented by an arrow symbol in both the floor plan and the model.
The smart model consists of the following objects:
- The building components you choose.
- The connections between these building components.
- The connections to building components outside the smart model, i.e. to the model's environment.