
Determine the Size of a Component Using the Dimension Table
General
- The dimension table presented in this instruction is related to the following functions when the component you are adding has a dimension table or variables.
- Function: Assembly |
 Add >
Add >  Component.
 - Context-sensitive function:
 Add > Component.
 - Add a Library Component
- Function: Assembly |
 When you search for component items in Vertex Flow, such a dimension table is not available. The component item in Flow contains information about the size to which the model associated with the item is varied.
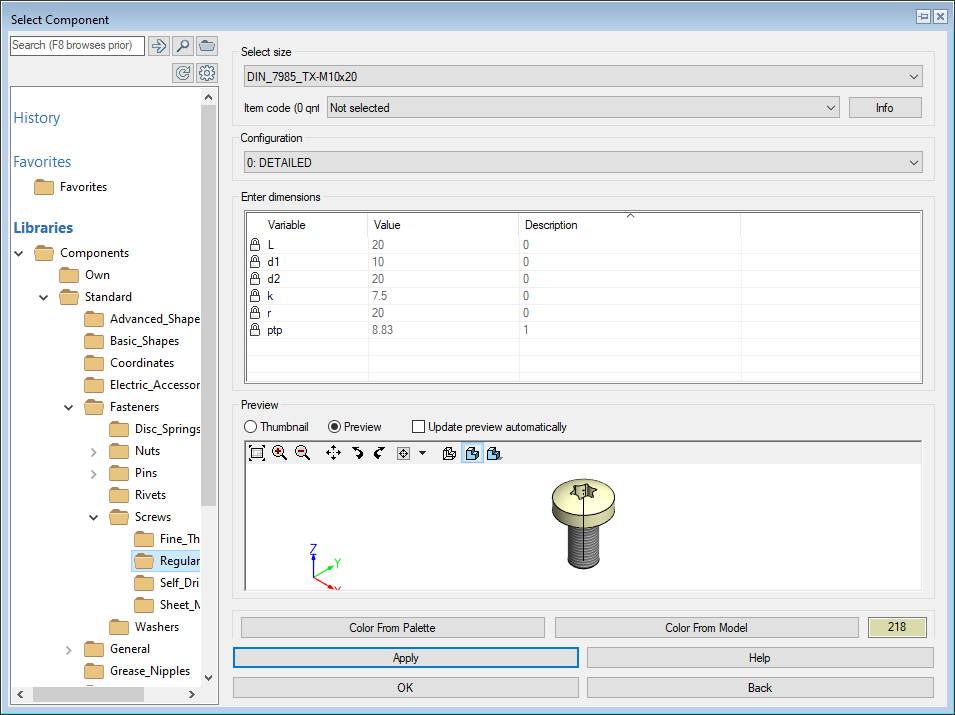
- Select the size
-
- Click the preset button
 .
. - Choose the appropriate size from the drop-down list.
- Click the preset button
- Note: This line is not visible in the dialog box if no dimension table rows are saved for the component.
- Item
-
- If there are items connected to the selected size, click the preset button .
- Select the desired item from the drop-down list.
- If no item has been connected to the selected size so far, the field displays Not selected.
- If there are items connected to the selected size, click the preset button
- Data
- This allows you to search for a suitable item and connect it to the to the size of the component.
- Search and connect:
- Click Data.
- The program opens the dialog box Material Data.
- Click the preset button in the Label field.
- The program opens the dialog box Class Selection.
- Click the preset button in the Main Group field.
- The program opens the dialog box Select Main Group.
- Double-click on a row to select the main group of the class.
- The program opens the dialog box Select Sub Group.
- Double-click on a row to select the sub group of the class.
- The program opens the dialog box Select Class.
- Double-click on a row to select the class.
- The Class Selection dialog box now displays the search criteria for the item.
- Click OK to start the item search.
- The program opens a list of items that meet the given search criteria.
- Double-click on a row to select the item.
- The program retrieves the item data in the Material Data dialog box.
- Select Link to save the item in the dimension table row for this component.
- The data is stored in the database d_COMPONENTLINK.
- The item linked in this way will be found later when the same component is added in the same size.
- Click OK to add the item to the component
- Click Data.
- Enter the dimensions
-
- You can only enter values of unlocked variables (shown in black).
- You cannot edit the value of a variable that has a lock
 in front of it and is grayed out.
- Select from Model
- In the dimension table row, you get the context-sensitive function Select from model.
 Image
Image- Displays the preview image attached to the component.
- You can check the effect of each variable on the dimensions of the component from the dimension image.
- If there is no separate dimension image, the program shows a preview image of the model (which is not updated).
- Preview
- Displays the geometry of the component
- The preview shows the part geometry.
- If the Update preview automatically option is selected, selecting the dimension table row will immediately update the component to the correct size.
- With some geometrically heavy components, the automatic preview image update does not keep up with fast line changes, so you should clear the above option and use the Apply button if necessary.
 Update preview automatically
- If this is selected and Preview is selected, the geometry will be varied as soon as you select a dimension table row.
- Color from palette
- A color can be retrieved for the component from the (old) Vertex color palette, which is still used in 2D drawings, but is otherwise no longer used in 3D modeling.
- Select the function Color from palette.
- The program opens the Vertex color palette.
- Double-click a color to select a color from the palette.
- Select the function Color from palette.
- Color from model
- A color can be retrieved for the component by clicking a surface on the model. Since only the colors of the Vertex palette are used as colors, the color may differ from the colors of the surface materials retrieved from the Rendering library.
- Select the function Color from model.
- Click the surface of the model in which you want the color of the component.
- Note that you may have to move the dialog box to the side when looking for a suitable colored surface.
- Click on the surface.
- The program colors the component with the selected color or a color close to it
- Apply
- You can see how the model looks with the values you entered or selected.