
Automatic rooms
The program will automatically add rooms based on the closed wall chains when the Automatic Rooms setting has been enabled. Enable the setting as follows:
- Open the project's document browser.
- Open
 Settings > Design settings.
 - Double-click
 Constraints and sketching.
 - Select
 Automatic rooms.
 - If necessary, you can enable the setting Lock Room Label Position. When the setting is enabled, the room labels remain in place even though the walls limiting the room are moved. When the setting is disabled, the room label is always automatically positioned at the center of the room.
- Confirm by clicking OK.
When you are adding walls and have selected the  Room-creating wall auxiliary function, the program will automatically create a new room in the floor plan based on the added wall.
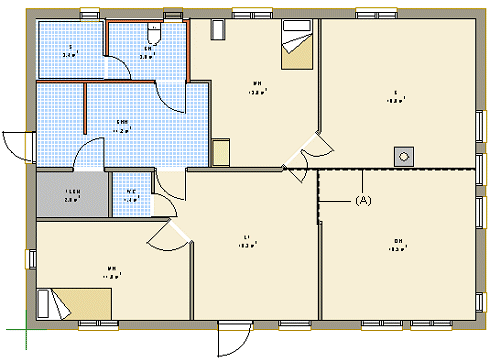
The color fill of the room is determined by the room label. You can edit the label of each room by double-clicking it.
You can divide a continuous space (for example living room - kitchen) into different rooms using a fictitious wall (A). The wall has only 2D geometry. In the Select Wall dialog box, choose Other walls library, the Divider Wall group, and the Ghost wall for separating rooms wall. The program will add the fictitious wall on layer 20 Space Divider Wall. You can hide the fictitious walls by hiding the layer in question from the floor plan.
- It is recommended to use automatic rooms especially when designing option building models.
- When Automatic rooms is enabled, you cannot delete rooms. The program will automatically generate them every time you edit or update the floor plan. The selected room labels are retained during the regeneration.