
Change a Feature in the Model
General
- You can change the selected feature to a library feature.
- The feature to be changed must be located on a planar surface, if the part has no history.
- An imported part has no history that can be modified to remove and replace the feature with a new feature.
- When positioning a library feature, the reference point maintains its location. For example, replacing a hole with an indentation keeps the center point in place.
- If you remove the Feature Change feature from the feature tree, the original feature is restored to the model.
- If you change a feature in a pattern, the other members of the pattern will not change.
Usage examples
- A part imported to Vertex can have a hole or indentation that you want to change to a feature in the Vertex library.
- For example, you can change a hole feature to a thread feature.
Change a feature to a library feature
- Select one face from the feature you want to change.
- Select the context-sensitive function Edit > Change Feature.
- The program opens the dialog box Change Feature.
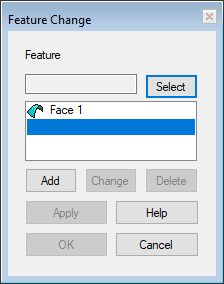
- The program opens the dialog box Change Feature.
- Click Select.
- Browse and select a replacement feature from the library.
- Click OK to accept the replacement feature .
- The program opens the dimension table of the library feature, if there are variables in the library feature.
- Select or enter values for the variables.
- Confirm the values by clicking OK.
- The program switches to sketching mode.
- Position the feature using sketch constraints.
- To exit the sketching mode, click
 or select the context-sensitive function
  OK.
OK.