
Change a Part or Parts of an Assembly to Another Part
General
- In an assembly, you can change:
- Part
- Item
- Subassembly
- Library component
- Assembly pattern
- Changing a part and item opens the browser for the class or folder from which the part to be changed originates.
- You can also select a new part from any new location, or based on some other classification.
- To maintain geometric constraints, the changeable parts must meet the following conditions:
- The parts must have the same topology. This is achieved e.g. so that one part is modeled first, which is then saved as a new part to which changes are made.
- The counterpart elements of the changeable part (surface, line, point) have the same name:
- Select an element (face, line, point).
- Select Properties.
- Enter the element Name.
Change a part as follows:
- Select in the assembly:
- Part
- Subassembly
- Library component
- First component of a pattern
- Select the context-sensitive function
 Change.
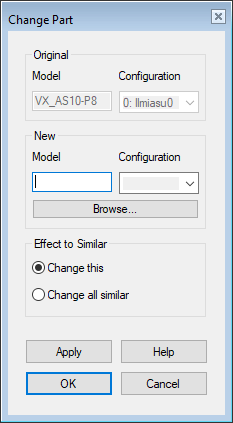
- The program opens a dialog box: Change Part.
- The program also opens the Select browser. Browsers
- Select a replacing part, subassembly, component, or item:
- If necessary, click Browse to reopen the browser.
- Select Configuration.
- If the model has configurations, you can select a configuration.
- Select which parts will be replaced
- Change This – The selected part/component only.
- Change All Similar – Parts.
- Select OK.