
Extend Faces
Advanced Face Modeling Package
General
- You can extend a face that may have been created by extruding, swiping, or being the end face of a mathematical cone.
- The face can be extended outwards (adding material) or inwards (cutting material).
- Use the function to increase or decrease the length of a feature (detail) of a part, or even to delete that feature, when the volume does not have a history that could be modified to make the necessary changes.
- You can also use this function on a volume modeled with G4 that includes history.
- The selected face must be a planar surface.
- The face must not be an end surface limited by spline surfaces. If you need to extend a cone-like spline surface, you can use the functions:

Extend the shape of a face that may have been created by swiping
- Select the ribbon bar function Part | Faces |
 Extend Faces or
- Import | Faces | Extend Faces.
- Import | Faces |
- Select one or more faces.
- Select Confirm (Confirm = V key, middle mouse button or the context-sensitive function
 OK).
OK).- The program marks the faces to be extended in the model with red and
- opens the dialog box Extend Face in which the faces to be extended are listed.
- Define in the Extend Face Data dialog box.
- Value or face offset.
- Formula, if you want to control the offset with a dimension table.
- Direction:
- In.
- Out.
- Edit the set of faces, if necessary.
- Add.
- Change.
- Delete.
- Click Apply to see what the part will look like with the values you enter.
- Edit the data in the dialog box, if necessary.
- Select OK.
Extend the selected face
- Select a face or faces that may have been created by extrusion or swiping.
- Hold down the Ctrl key if you select more than one face.
- Select the context-sensitive function
 Faces>
  Extend.
 - Continue as above, steps 4...7.
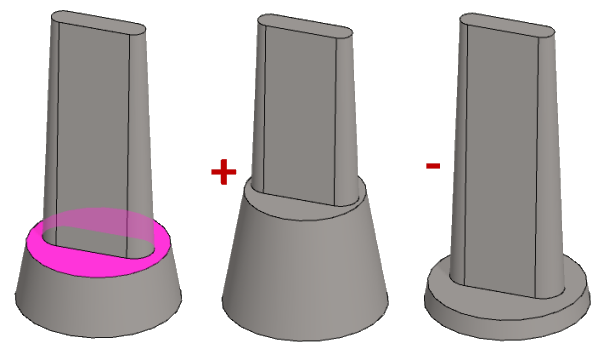
Example 1:
- The conical face is extended outwards (+) and inwards (-).
Example 2:
The face limited by draft faces can be extended

- The hole in the image deepens when In is selected.
- The hole in the image lowers when Out is selected.
Example 3:
Extension of a spiral pipe
- The height of the spiral on the left is 200 and the diameter is 120. The diameter of the cross section is 20mm.
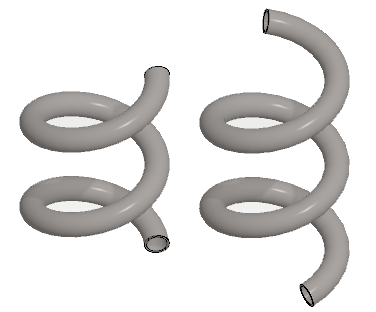
- You will be able to extend little by little. Experiment to find the right value.
- The extension was successful at 95 mm, but at 100 mm the pipe was shortened.
- However, the spiral pipe can be extended again.
Example 4:
- The part has an extra 15mm long protrusion that you want to remove.
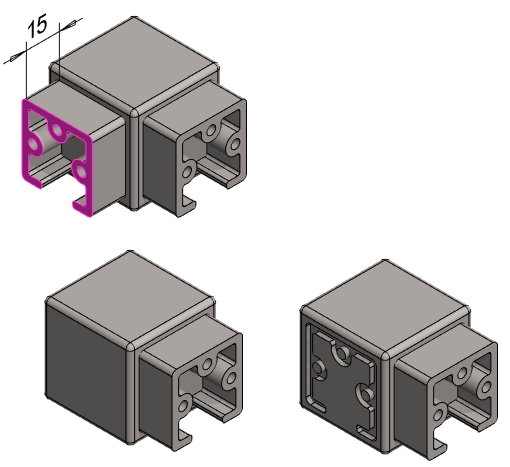
- In the image on the left, the surface is extended 15mm In.
- In the image on the right, the surface is extended 17mm In.
Note:
- Edit the feature by selecting it from the feature tree and clicking Edit.
- The Extend Face Data dialog box opens.
- Edit the values and the selections.